
Creating a new Project
Projects give your work a home in Assist 2.0 — a space where related chats, knowledge and outputs live together. Here's how to create one.
In Assist 2.0 there are two ways to create a Project:
- Conversationally — let Assist set one up for you as part of a chat
- Manually — create one yourself from the Projects menu
Option 1: Let Assist create a Project for you
This is the quickest way, and the one we recommend most of the time.
- Start a new chat and describe what you want to do. For example: "We want to make a release newsletter for our new feature."
-
Assist will ask some clarifying questions. One of these will be whether you'd like a Project set up to organise the work, and it will suggest a couple of sensible names.
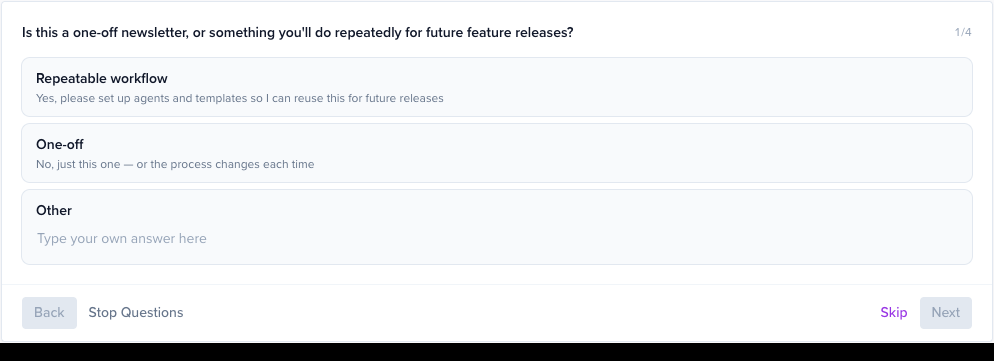
- Click the suggested Project name you want, or type your own. If you don't need a Project, click No project needed.
-
Assist will include "Create the project" as part of its plan. Approve the plan and Assist will create the Project for you and scope the work to it.

That's it — the Project is created, named, and ready to go. Any knowledge Assist needs is pulled automatically from your Workspace Knowledge as the chat continues.
Option 2: Create a Project manually
-
In the left-hand navigation, find the Projects section and click the + icon.
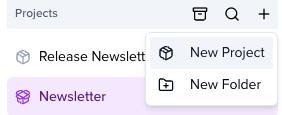
- Give your Project a memorable title and a short description of what it's about.
- Save the Project.
You can then open the Project and start a chat inside it — anything you do there will be scoped to that Project.
A few things to know
Workspace Knowledge is included automatically. You no longer need to choose which knowledge applies to a Project on creation. Assist pulls from your Workspace Knowledge as needed, and you'll see it gathering context at the start of each chat.
Access is managed centrally. Who can see and work in a Project is controlled by the Roles assigned to users at the Organisation level, rather than per-project read/write/manage settings. To manage this, go to Organisation → Users and Organisation → Roles.