How to Clone a Workspace Agent
Overview
Cloning a workspace agent lets you quickly duplicate an existing agent with all its settings, saving time and ensuring consistency across your workspace. This is useful when you need to create similar agents without configuring each one from scratch.
What Gets Cloned?
When you clone an agent, the following settings are automatically copied to the new agent:
- Description — The agent's purpose and functionality description
- Tone & Interaction Style — Communication preferences and behaviour
- Visibility Settings — Private or shared access permissions
- Color Theme — Visual identification colour
- Behind-the-Scenes Guidance — Internal instructions and guidelines
Note: The cloned agent receives a unique mention tag automatically (e.g. if the original is @M3LabsBrandGuardian , the clone becomes @M3LabsBrandGuardian2 ).
Step-by-Step Instructions
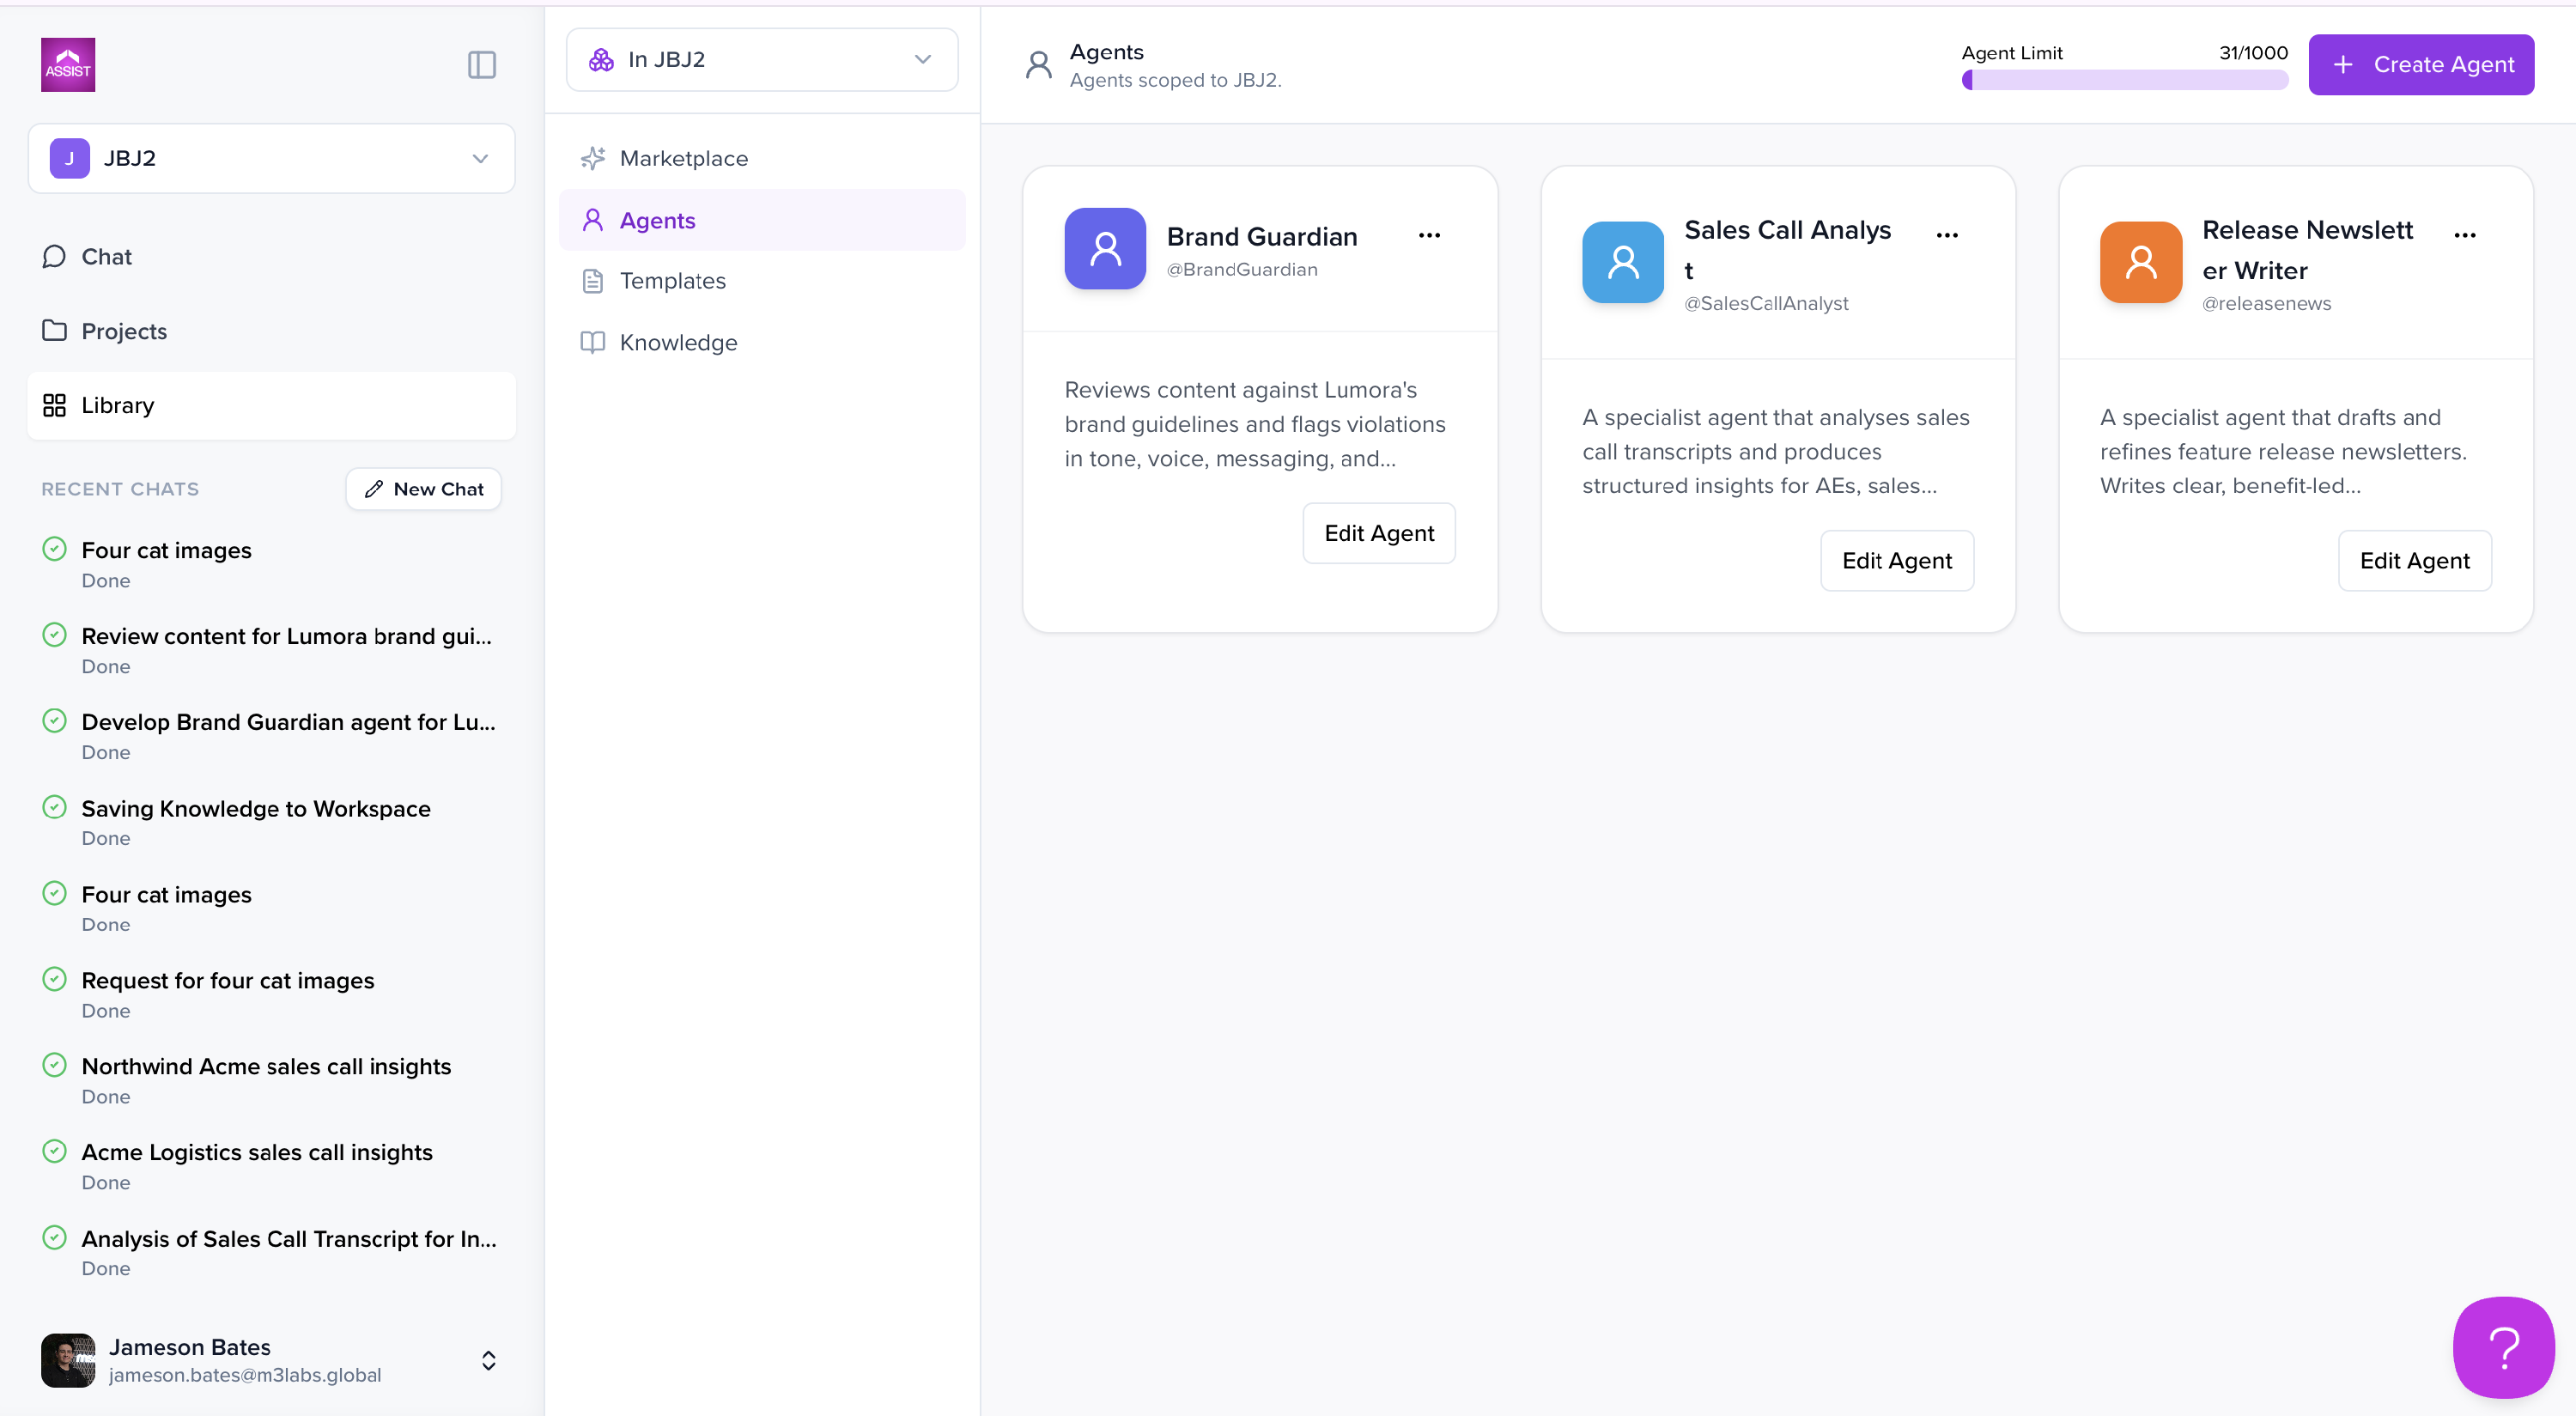
Step 1: Open Your Workspace Agents
- Open your workspace in Assist 2.0
- Select Library from the left-hand navigation
- In the Library, select the Agents tab
- You'll see all agents scoped to your current workspace, along with an Agent Limit counter (e.g. 31/1000) in the top right
Step 2: Select the Agent to Clone
- Locate the agent card you want to duplicate
- Click the three-dot menu (⋮) on the agent card
- A dropdown menu will appear with available options
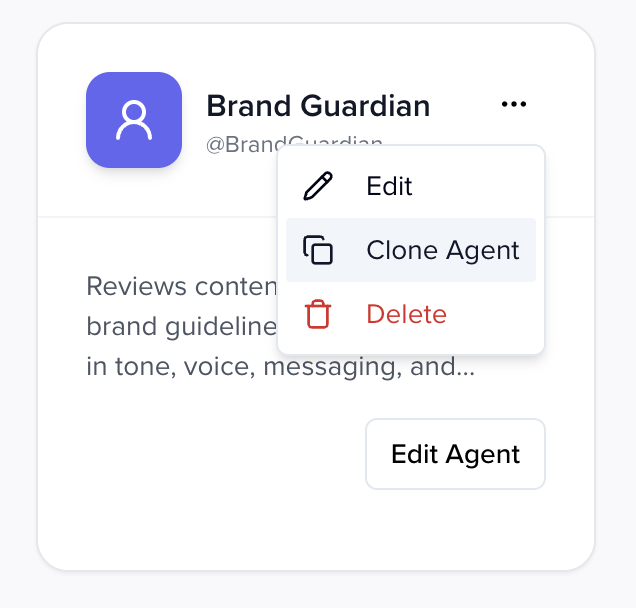
Step 3: Initiate the Clone
- From the dropdown, select Clone Agent
- The Clone Agent dialog will open
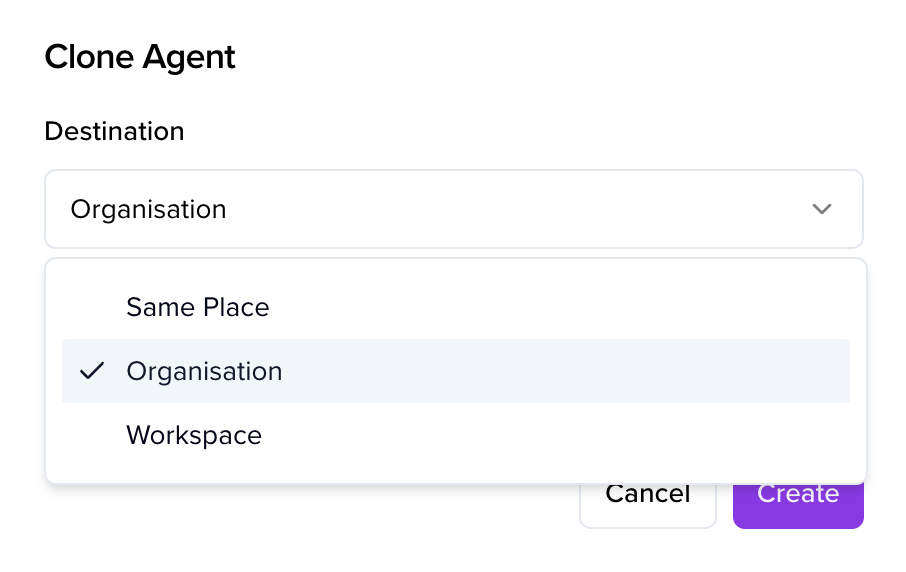
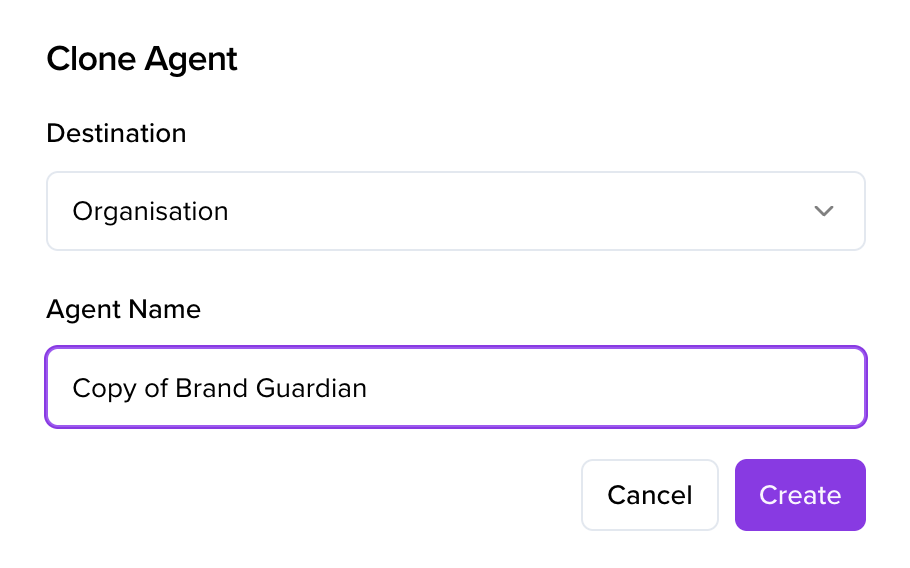
Step 4: Configure Clone Settings
In the Clone Agent dialog, you'll see two fields:
-
Destination: Choose where to create the cloned agent
- Select Same Place to keep it in the current workspace (default)
-
Or choose a different workspace you have access to
Agent Name: Defaults to "Copy of [Original Agent Name]"
- You can customise this name before creating the clone, or rename it later
Step 5: Create the Clone
- Review your settings
- Click Create
- You'll see a "Cloning agent…" notification
- Once complete, a success message appears: "Agent cloned successfully"
- You'll be redirected to the Agent Details page for your new agent
Step 6: Review and Update (Optional)
- On the Agent Details page, review the copied settings
- Make any adjustments
- Click Update Agent to save changes
- You'll see: "Agent updated successfully"
Step 7: View Your Agents
Return to Library > Agents. Both the original and the cloned agent now appear as separate cards, each with its own mention tag, and each can be managed independently.
Important Notes
- Agent Limit: Each workspace has an agent limit, shown in the top right of the Agents page (e.g. 31/1000). Cloning counts toward this limit. If you've hit the limit, contact your account manager to discuss increasing it.
- Unique Mention Tags: The system automatically generates a unique mention tag for the cloned agent to avoid conflicts.
- Independent Agents: Once cloned, the new agent operates independently. Changes to one don't affect the other.
- Permissions: You need the appropriate workspace permissions to clone agents.
- Workspace Scope: Agents live within a workspace. Cloning to a different workspace creates a fully separate copy — knowledge and context don't carry across workspace boundaries.
Use Cases
Cloning is particularly useful for:
- Creating Agent Variations — Build multiple versions of an agent with slight differences
- Team Standardisation — Keep agent configurations consistent across your team
- Testing & Development — Create test versions of production agents before changing the original
- Scaling Workflows — Quickly deploy similar agents for different projects or departments
- Template Management — Use well-configured agents as starting points for new ones
Troubleshooting
Q: I don't see the Clone Agent option
- Check you have the necessary permissions in the workspace
- Make sure you're clicking the three-dot menu on the agent card itself
Q: The clone failed to create
- Check whether you've reached your workspace agent limit
- Verify your permissions
- Refresh the page and try again
Q: Can I clone an agent to a different workspace?
- Yes — select the destination workspace in the Destination dropdown when configuring the clone
Q: Can I rename the cloned agent later?
- Yes, you can edit the agent name at any time from the Agent Details page